
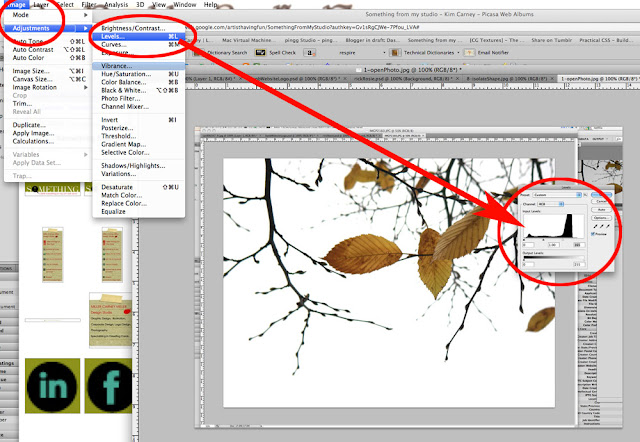
1. Open a your photo. Ideally, your photo will not have a lot of background noise. The whiter the background the better, easier to turn into a silhouette. In photoshop go to image - adjustments - levels to lighten up background. (shortcut: command L)
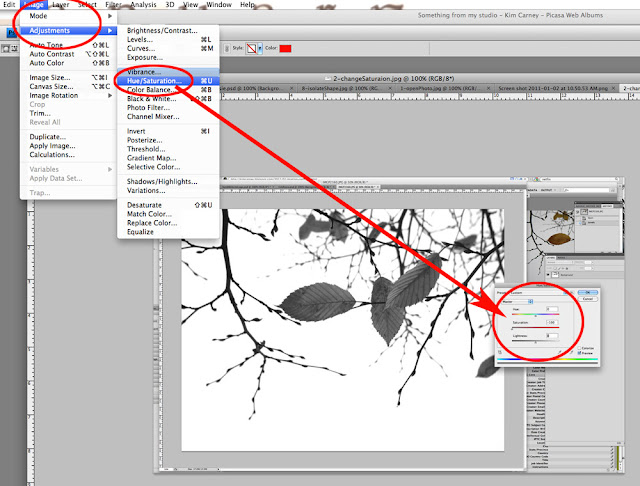
2. Turning the image black and white. Go to image - adjustments - hue/saturation ... adjust the saturation and turn your image black and white (or sometimes parts will remain gray). (shortcut: command U)
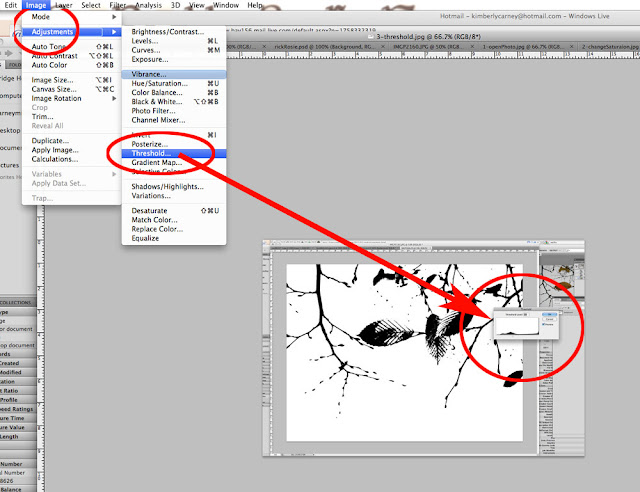
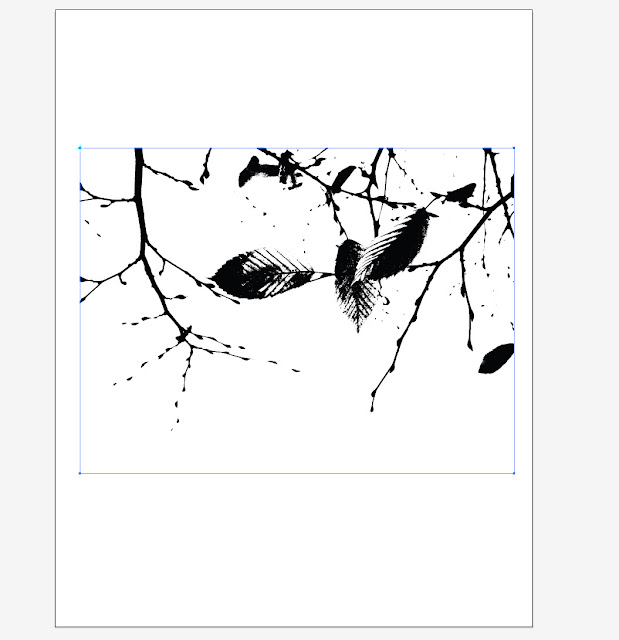
3. Adjust the threshold to your desired amount of detail. Go to image - adjustments - threshold. Use the slider bar and you can see the amount of detail change.
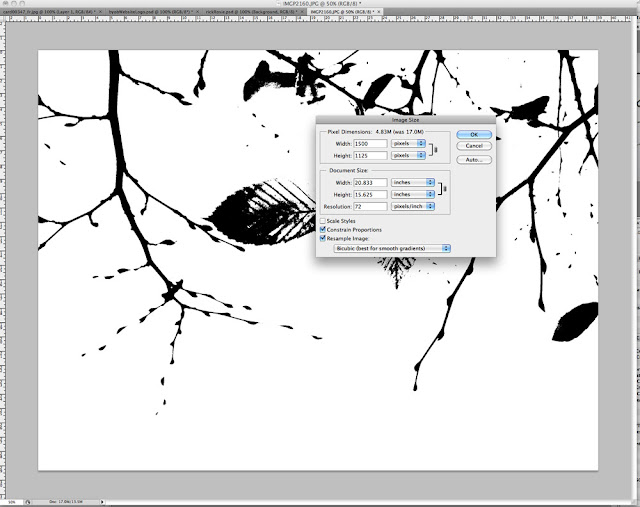
4. Change the image size of your photo. I usually change it to 500 or 1000 pixel wide. You don't want to copy a 35 inch wide image over to illustrator. Or maybe you do. But it makes it easier to work with a smaller file. Go to image - image size
5. Here comes the easy part. Do a Command a, command c (copy all), go to your Adobe Illustrator file and Command n (for new file), then Command v (for paste). You have just copied the photo with adjustments over to an illustrator file.
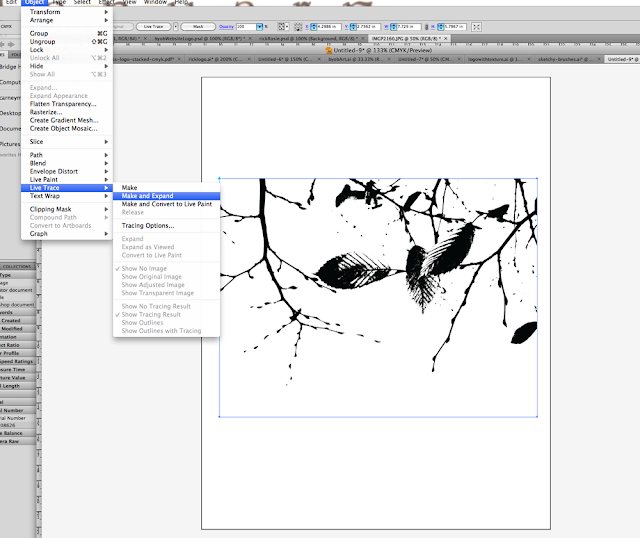
6. In Illustrator, go to object - live trace - make and expand
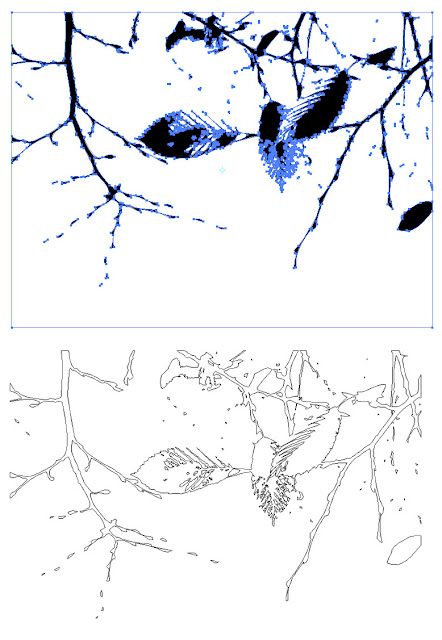
7. You will now have a vector image. To remove the white background, click on the white with the magic wand and delete. I am showing you the actual vector path below ... this image will be grouped. You might need to ungroup to select a piece of the image.
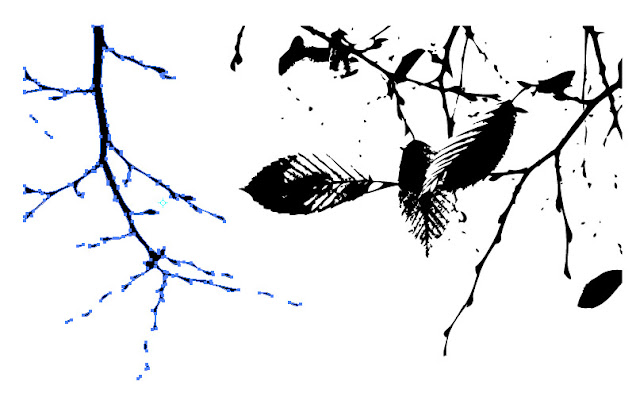
8. For a pattern I will isolate a piece of the art and copy it over to a new file. Change colors.
This is the technique I used to make the Grapevine Tendril font in Adobe Illustrator. You can use the silhouette to make brushes in Photoshop. Or brushes in Adobe Illustrator. If you need more explanation, just ask, I can walk you through it. Share what you make using this tutorial! I need some inspiration!
Live trace tutorial when you need to isolate the background. This is very good, has lots of explanations of terms and presets.
Live trace tips at Tutorial 9.
Pixel Perfect Tracing in Adobe Illustrator has really good explanations about perfecting the image.


3 comments:
Wow. Thanks for this Kim. I know next to nothing about Illustrator. So anything you might share from your experience is greatly helpful!
I know Adobe Illustrator pretty well - so you only have to ask and I can try and talk you through it! ;)
oh, thank you Kimmie for the great tutorial. I love the way you illustrate the how to steps. You're amazing. I wish you could somehow make making tutorials into a cash-earning job. So...... now I just need to get a working copy of Illustrator. Mine is super old and doesn't work anymore on the computer I have now. $$$
Post a Comment